Friday, June 27, 2014

Lemon Thyme Vegetable Hash

Untitled design-6

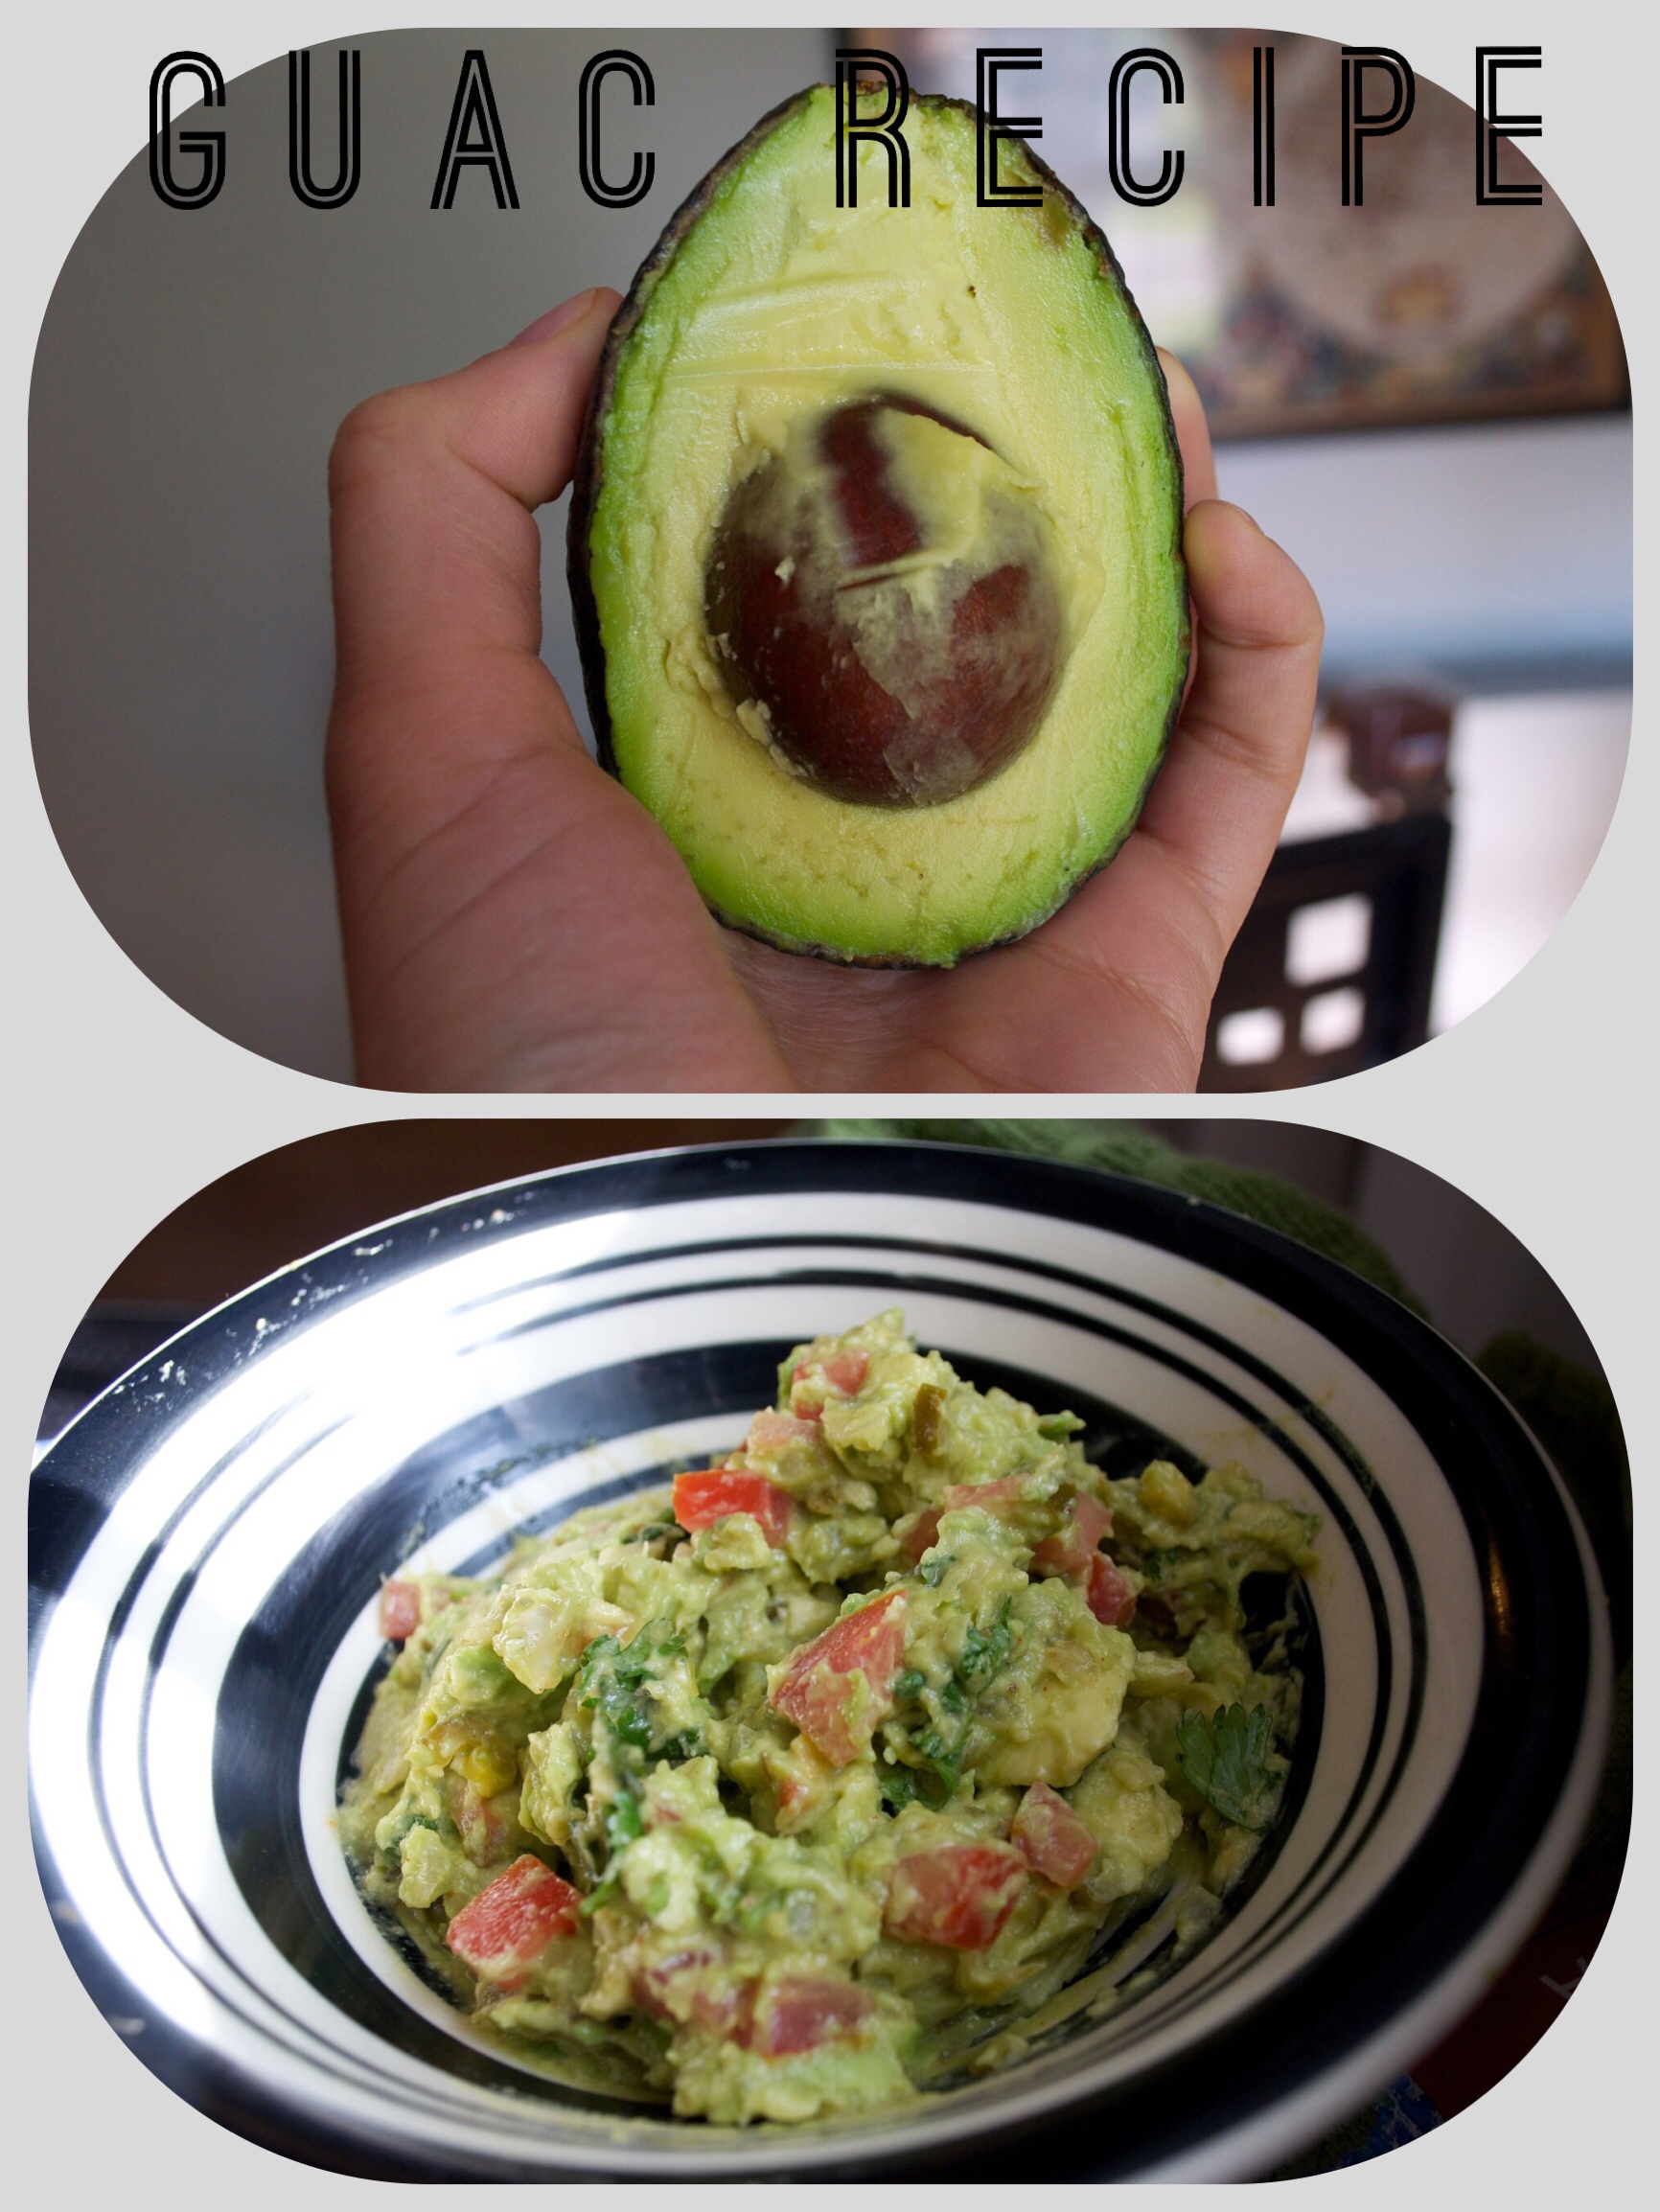
My mother-in-law has been talking about green bean delivery for what seems like years now. My husband's aunt (who I loved dearly) in an attempt to get more veggies into her diet when she first got sick, started using this strange service back in 2009. And I think it worked for the most part. It's certainly easier to eat what's already in front of you. I don't think it was too popular at that point, but now, several years later, I can't seem to avoid green bean delivery.

So I signed up! While I think the cost of the vegetables is quite a bit more than you'd pay for conventional at the grocery store, the quality of these local, organic fruits and vegetables is absolutely on point. You can taste the difference.

Each week your able to customize your box with different fruits and vegetables, but somehow I let zucchini into my basket. Truth be told, I'm not a huge fan. Now facing two giant zucchinis in my refrigerator, I had to make something with them.

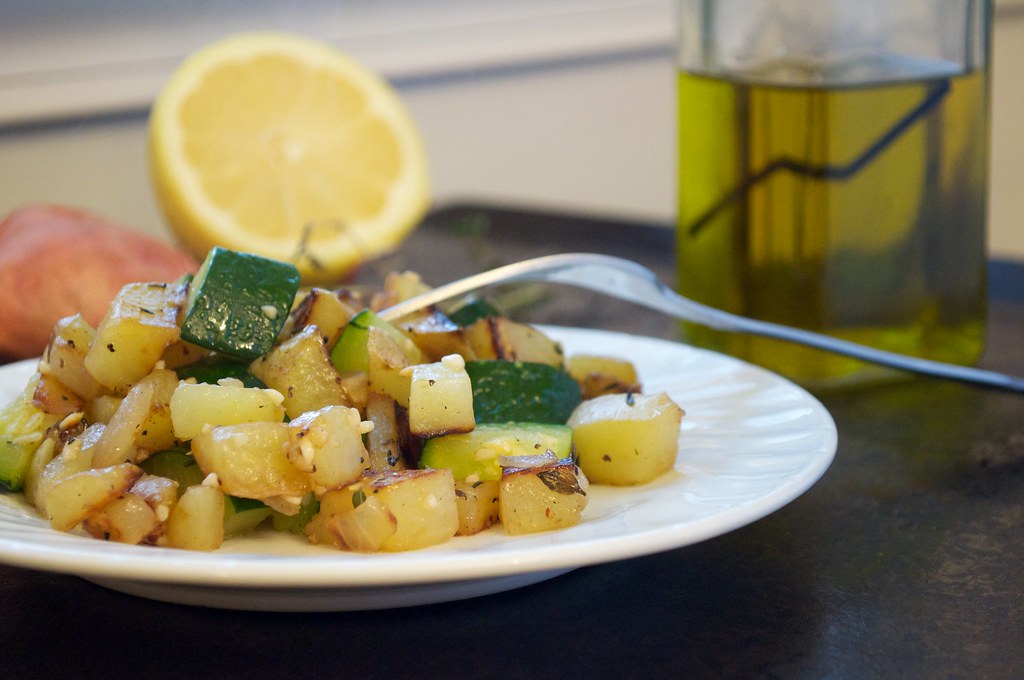
I find that a vegetable hash is a good way to sneak in more variety without force feeding yourself things you don't like. Lemon & thyme are a classic combination that gives this dish a light freshness perfect for a summer bbq or a FIFA World Cup viewing party. I purchased all the vegetables from green bean delivery, and the quality of this dish was fantastic.


Lemon Thyme Vegetable Hash
Serves 2-4, pending appetite assessment  

1 giant zucchini
2 medium sized yukon gold potatoes 
1 shallot
1 tsp garlic, minced
3-4 sprigs of thyme
juice of 1/4 of a lemon
2 tbsp olive oil 
Salt & pepper to taste
Optional: tofutti sour cream on the side

* Chop your potatoes into very small cubes. Chop your zucchini into thick slices and then quarter the slices. Mince or finely chop your shallot. 
* Heat your olive oil in a skillet with a little salt on medium heat. When heated, add your potatoes and shallots and cover. Allow your potatoes to cook and soften for about 10-15 minutes. Check your temperature and lower the heat if they brown too much. 
* When the potatoes are just about done and your shallots have softened, add your zucchini, sprigs of thyme tied together, and garlic. Toss around and cook covered for about 5 minutes or until your zucchini is tender and bright green. 
* Last, remove skillet from heat and add your lemon juice, salt, and pepper to taste. Remove your thyme sprig bundle and serve with a side of tofutti sour cream.


Vegetable Hash

Wednesday, June 25, 2014

Yurtastic Chickpea Salad

Untitled design-5


We returned from visiting Andrew's family and some friends in Ohio late Sunday evening, and my motivation for cooking interesting things has been a little diminished. My sleep cycle is all out of whack, I nearly fell asleep during my commute home yesterday. But cramming as much as possible into our little weekends over there is really important to me, so we make it work. It's strange having uprooted my life so many times, every new city starts to blend together - and it oddly makes my wanderlust even stronger. When I go visit somewhere I used to live, I'm suddenly eager to live somewhere new. It's like, the less attached I feel to one city, the less I feel like I belong to a city. I spent 12 fantastic years in Santa Barbara - it's where I grew up - but I don't feel any allegiance to it. I've lived in Sacramento, Berkeley, Columbus, OH...  now Indy. I'm not sure I'd call any of them home. But I tend to wear my cities like a badge of honor - I've lived here. I know this place. 

To curb my itchy feet, I try to plan exciting vacations. I'm not much of a camper, but I've really be into these yurts. They're like decked out huts. Camping, or "yurting" rather (that's not a real phrase, don't go around saying that), has 2 benefits - one, I can commune with nature at a distance and two, we can bring our dogs. I just have to find a yurt that let's us bring dogs...

Hopefully some day soon I'll be blogging from a yurt in a Canada. 

Source: http://en.wikipedia.org/wiki/Yurt#mediaviewer/File:Gurvger.jpg

Anyway, I think this dish is perfect for your next yurt adventure. I plan on bringing some. It would stay nicely in a cooler and you can make larger batches fairly easily. There are a lot of great variations of chickpea salad if this one doesn't twirl your skirt up. Some of my favorites come form "Yeah, That 'Vegan' Shit",  where she uses nutritional yeast and kelp powder to create "mock tuna", and of course the PPK's minimalist variation, using traditional chicken salad ingredients. 

But I like to give new variations new twists. This chickpea salad sandwich packs a little heat using minced jalapeños and a touch of cayenne pepper. I opted for minced shallots rather than yellow onion. And of course, a heaping helping of vegenaise. 

Yurtastic Chickpea Salad
Makes 4 sandwiches   

1 standard can of chickpeas
1-2 tbsp minced jalapeño, fresh or jarred
1/4 tsp minced garlic
1 finely chopped shallot
a pinch of paprika
a pinch of cayenne pepper
salt & pepper to taste 
4 tbsp vegenaise

* Rinse your chickpeas in a colander in the sink. Place them in a high speed blender or a food processor & pulse 2 to 3 times to pulverize the beans, but don't let them get TOO mushy. You just don't want any whole beans.
* Place your blended chickpeas in a bowl and mix with the rest of the ingredients. You can refrigerate and eat for the next few days.
* I like to eat these with a little chipotle mustard on a whole wheat bun! 

Chickpea Salad Sammie

Monday, June 23, 2014

Spicy Brussels Slaw

Untitled design-4

Another holiday is nearly upon us, and it's yet another food-centric one. For vegans, that can mean a lot of things.  You can wallow at home in protest of barbecues laden with franks and burgers, avoiding the awkward questions "can you eat this?" and the fuss people seem to make that always ultimately leads you to a plate full of crackers and fruit salad. Or, you can rise to the challenge... creating something seemingly "normal" and impart a little vegan food into the lives of your unsuspecting victims.

I always plan ahead for these sorts of things. Bring some veggie burgers with you and a few badass sides that no one will think are vegan. It has two benefits. One, you actually get to eat. And two, it's fun to see people happily eating something and then panic when you tell them it's vegan. Particularly kids. They always think they're eating something weird!

This cole slaw recipe, while hardly traditional, is a great option to bring. I don't really like the feel of raw cabbage, so I opted to use roasted and shredded brussels sprouts. I also like this served hot, but it would still work very well refrigerated. It's hard to go wrong with vegenaise and sriracha!

Spicy Brussels Slaw
Serves 2-4 people, pending appetite assessment  

2 cups shredded brussels sprouts
1 shallot, finely chopped
4 tbsp vegenaise
1 tbsp sriracha
Cooking Spray
Salt & Pepper to taste


* Preheat your oven to 425.
* While that's preheating, chop up your shallot and shred your brussels sprouts. I just use a knife and cut them like I'm slicing an onion. They pull apart easily in your hands. 
* Using a dark cookie sheet and some foil, spray your foil with cooking spray. Place your brussels on the foil sheet, then your shallots, and spray with a little more cooking spray and toss together.  
* Fold everything up to cover all the brussels sprouts and shallots, leaving a little opening at the top to release steam.
* Place your foil pouch on your cookie sheet and into the oven to cook for about 15-20 minutes. 
* While that's cooking, whisk together your vegenaise and sriracha. 
* When your brussels sprouts are finished in the oven, remove them and immediately place in your bowl with the sauce, stirring them to coat. Taste and add salt and pepper as needed.
* You can serve immediately with a drizzle of sriracha, or refrigerate and serve cold the next day. 

Brussels Slaw

Friday, June 20, 2014

Killer "Buttermilk" Biscuits & Gravy w/ Gardein Chick'n

Biscuits & Gravy

A lot of really "bad" foods are vegan.  I always tell people, "The less real the product is, the more vegan it is". Which is always funny to them, because they think of vegans as so healthy. That pillsbury buttercream frosting? Vegan. Not a lick of real butter in there. Your precious oreos with cream filling? Vegan. Not an ounce of cream in there. And as convenient and awesome as those products are, and as thankful as I was in my early vegan days for such modern conveniences, pre-made biscuits just don't hold a candle to the homemade ones.

I have a lot of comfort foods in my life, and these biscuits are one of them. Growing up, my parents always made those shamefully unhealthy, just-so-happen-to-be-vegan biscuits from a can (a can that pops really loud and scares the heck outta me no less). So when I finally started making them at home, I was baffled by how much better they are. Sure, they're a little misshapen, and their flakiness doesn't have that factory standard seal of approval, but they have a freshness and a lightness that you can't manufacture.  Topped with some awesome (and convenient) gardein strips and a killer gravy, I guarantee this will make you never want to buy a can of pillsbury biscuits again.

Killer "Buttermilk" Biscuits & Gravy 
Makes 8 big ole biscuits and enough gravy for all


Biscuits (recipe below)
Gravy
  1/2 cup raw cashews
  water
  2 tbsp earth balance
  1 tbsp olive oil
  1/2 cup chopped mushrooms of your choosing, I use portobellos
  1 shallot finely chopped
  1 tbsp chopped fresh poultry seasoning blend (a few sprigs of thyme, rosemary, and sage)
  Salt and Pepper to taste (I use about 1/4 tsp of salt)Gardein Chick'n
  Optional: creole seasoning and cayenne pepper

Optional: Green onions for garnish 


* Bake your gardein chick'n first. I season it with creole seasoning and cayenne pepper, but you can just bake them as is if you don't want to mess with it. This takes about 15-20 minutes. When they're finished, set aside in a warmer and increase your oven temp to 450 for the biscuits.
* Prepare your cashews. Place your cashews in a blender and fill with water to 2 1/2 cup line. Blend on high for about 8 to 10 minutes.
* While they're blending and when your oven is ready, place your biscuits in the over and bake for 10-12 minutes.
* While those are baking, heat a little salt, earth balance, and olive oil in a pot on medium heat. Add you mushrooms and shallots, cooking for about 8 minutes, allowing the shallots to soften and the mushrooms to brown.
* When ready, add you seasoning, nutritional yeast, and blended cashews to your pot of mushrooms and shallots. Mix and allow to bubble and thicken about 10 minutes. If your oil and cashews are separating too much, constantly stir or whisk your sauce as it thickens to allow the sauce to come together. 
* When your biscuits are ready, place 2 on plate, top with big scoops of gravy, a few pieces of chicken, and some green onions if you like for garnish. 


To Prepare the Biscuits:
2 cups all-purpose flour

1/4 tsp baking soda
1 tbsp baking powder
1 tsp salt
6 tbsp cold earth balance buttery spread, soy free
"buttermilk" - 1 cup unsweetened, plain almond milk + 1 tbsp white vinegar 

* Preheat oven to 450. 
* Add the vinegar to the almond milk and set aside in the fridge to keep cold.
* Whisk together the flour through salt. You can use a standup mixer or do it by hand. 
* Using a stand-up mixer on a low speed, add the cold earth balance, one tablespoon at a time. Then quick pulse a few times until it resembles a coarse meal, like wet sand.
* Add "buttermilk", until JUST combined. Place on a floured surface rolling once or twice to form a ball. Then flatten out with your hands to about 1/4 once thick. Try to handle with your hands as little as possible to keep the dough cold. Fold the dough in half, flatted, and fold over again about 5 times. Shape into a rectangle about 1" thick.
* Cut your rectangle of dough into 8 squares, and gently shape them into round circles if you like. Place on a sheet and put in the refrigerator until ready to bake.
* When ready, place an inch or two apart on a dark baking sheet for 10-12 minutes. Lay them cheek to cheek if you prefer a softer biscuit. 
*They will be puffy, golden and awesome when ready.


Biscuits and Gravy

Thursday, June 19, 2014

A Vegan Croque Monsieur | Now Known as "The Crunchy Mister"

Untitled design


There are SO many foods I never tried before I went vegan. Many of them I cringe at the though of trying, but sometimes I wonder - how can I accurately veganize something without knowing what it tastes like? But then it occurs to me, perhaps never knowing what it really tasted like allows me to enjoy a NEW version of that food merely inspired by their "meat & potatoes" version. They can stand alone in my mind and be completely delicious without having to harken back to flavors I remember. As delicious as a chickpea salad sammie can be, it will never replace the very powerful flavor & scent memories I have eating tuna fish sandwiches with my dad when he'd come home late from work. 

Suffice it to say, such delicacies like fermented shark meat are not really on my bucket list of "Things I Really Want to Recreate", and I think we'd be wise as vegans to let that shit GO. And really, probably let a lot of old "normal" foods go, like steak. You're not getting a vegan steak, people. That's just not happening.

But every now and then, I see a dish and think to myself - now I can DEFINITELY make a delicious vegan version of that. 

The croque monsieur is a french dish created in the early 1900's designed for the changing times, namely a desire for a "quick lunch". Roughly and hilariously translated, croque monsieur means "crunchy mister". Traditionally, it's grilled to a crisp in butter, filled with ham and some fancy french cheese, and then covered in a delicate béchamel sauce, sometimes stuck in the broiler to brown. My version is fried in earth balance, filled with tempeh bacon, daiya cheddar cheese and topped with a delicate cashew cream sauce, and it's absolutely fantastic. 

Because I've never tried a real croque monsieur, and I'm sure a cashew sauce is very different from a béchamel, I like to call this a crunchy mister. I'm not sure this will bring back any old memories you have of sitting in parisian cafes and people watching, but it will be delicious. It's vegan, inspired by a croque monsieur, and sure to be worth a few new food memories.


The Crunchy Mister (A Vegan Croque Monsieur)
Serves 2 people  


1/2 cup Daiya Cheddar-style Cheese
4 pieces of whole wheat bread
2 tsp of earth balance buttery spread
1 recipe of cashew béchamel (recipe below)
Green onions and paprika for garnish 

* Place 1 tsp of earth balance in a pan on medium heat with a pinch of salt. Allow it to melt and start to bubble a bit. 
* When ready, your bread on the pan. Using 1/4 cup of daiya cheese per crunchy mister, place half the cheese down, then 1/2 of your tempeh, then the rest of your cheese, then the other slice of bread. The daiya cheese acts as a sticky layer to prevent the tempeh from falling around.
* Spread the remaining tsp of earth balance, 1/2 tsp per sandwich, on the top layer of bread. Cover with a lid and allow to brown and get crispy for about 1-2 minutes. Be sure to check and make sure they are not burning!
* Flip your crunchy misters and allow the other side to cook for about 1-2 minutes as well.
* Remove from pan. Top each sandwich with 1/2 of your cashew béchamel sauce, sprinkle with paprika and green onions, and enjoy immediately. 

To Prepare the Cashew Béchamel 
- 1/4 cup cashews
- Water
- 1 tbsp earth balance
- 1/2 tsp paprika
- 1/4 tsp onion powder
- 2 tbsp nutritional yeast
- a pinch of turmeric for color
- salt and pepper to taste 

* Rinse your cashews and place in a blender. With the cashews in the blender, fill your blender to the 1 1/2 cup line with cold water. Blend for about 7-10 minutes until very smooth.
* Place cashews in a pan with your spices and nutritional yeast. Cook on medium to high heat for about 8 minutes, allowing to bubble and thicken.
* Remove from heat and whisk in 1 tbsp of earth balance.

Vegan Croque Monsieur

Vegan Croque Monsieur

Wednesday, June 18, 2014

The Cursed Organic Banana

Untitled design-2

If you've ever purchased an organic bunch of bananas, you know EXACTLY what I'm talking about. One day they are green, then there this ONE day window when they are perfect, then they are a mushy, brown mess for the next week. I've tried buying less bananas, but that leaves me frustrated with not having enough! So in the interest of not wasting them or defaulting back to conventional bananas, I've attempted to use all those bananas in that brief windows when they are fresh and ripe.

Andrew makes a lot of PB Chocolate Banana smoothies, and he prefers to use them fresh. But I prefer to chop each banana, store in separate containers (they stick together otherwise), and have them ready to use for my next smoothie! This also has the added benefit of keeping the smoothie colder and improving the consistency.

banana bread

Of course, when your bananas go all brown and mushy, that's the perfect time to make banana bread. One of my FAVORITE recipes is from the PPK. It's really sweet, PLUS I add chocolate chips which only makes it sweeter. But that's how I like my banana bread! You should definitely try this recipe to cure your old, organic banana blues.

Peanut Butter Banana Dog Treats

My favorite thing to do, though, is make dog treats. You can always go with the classic banana chip. Or, you could slice, top with peanut butter & cinnamon, and make adorable frozen pup treats! Buying dog treats can be pretty expensive, especially if you have 3 dogs like us. This is an easy way to cut costs using things we have on-hand. Our dogs are OBSESSED with all things peanut butter and they love to eat bananas, so this treat is a no-brainer for them. Plus, bananas have carbohydrates to give your pup energy and nutrients to help keep their coats shiny & beautiful. Georgia Peaches loves these so much, she literally spit out another treat she had ALREADY IN HER MOUTH when I had one of these in my hand. They have the uber dog stamp of approval.

Tuesday, June 17, 2014

Mujadara with Quinoa & Sautéed Spinach

Mujadara Recipe

We had a few staples in my house growing up, and I don't think that I realized that they were abnormal until I met Andrew. Hummus, pita bread, and olives were always in our fridge. I know hummus and pita are sort of a big deal now, and for many vegans are generally a staple, but growing up none of my friends ate that sort of thing. My mom comes from a Lebanese background, and we had a lot of traditions and recipes that somehow made it to my family through the years. My Uncle Steve used to make these little meat pockets called fatires. They were encased in an amazingly fluffy, buttery dough and filled with perfectly spiced ground meat. I've never tried to veganize them, but hopefully one day I'll get my uncle to show me how to make them.

In Columbus, OH there's a Middle Eastern food chain that specializes in Lebanese cuisine, Aladdin's Eatery. My father-in-law claims everything there tastes like dirt, but if you love Lebanese food, you'll like this place. One of our favorite dishes there is the Mujadara Plate. It's a wonderful dish my family never made growing up, probably because vegetarian dishes are looked at as peasant food, but we love it. And now that I don't live in Columbus, I felt the need to make it at home.

This dish is very easy, relying heavily on your lentils and spices. Traditionally, Mujadara is a mixture of green lentils, brown rice, and crispy onions. I've subbed the brown rice for quinoa and caramelized my onions, rather than making them crispy in a deep fryer. You could still make this with  the brown rice, you'll just need to cook it a bit longer.

DSC_0292


Mujadara with Quinoa & Sautéed Spinach 
Serves 2-4 people, pending appetite assessment  

1 cup dried green lentils, soaked for about 10 minutes and rinsed in cold water
1 cup quinoa, rinsed
3 yellow onions
3 tbsp olive oil
2 vegetable bouillon cubes
Water
1 tbsp cumin seed
1-2 tsp cayenne pepper (depending on your heat preference)
1 tsp cardamom 
1/4 tsp onion powder
1/4 tsp garlic powder
3 cups fresh spinach
Juice of 1/2 a lemon
Salt to taste 
1/4 cup freshly chopped cilantro


* Soak your lentils in cold water and run your quinoa under cold water for a few minutes.
* Blend all your spices with a pinch of salt in a spice grinder or a coffee grinder about 30 seconds. Set aside.
* Dice 1 of your onions and chop finely. Using a mandolin slicer or your sweet knife skills, slice the other two onions very thinly into rings. 
* Heat 1 tbsp of olive oil in a large, heavy bottom pot on medium heat. Add your spices and toast for about 1 minute. Add your chopped onions to the pot and cook until softened for about 10 minutes.
* Rinse your soaking lentils, and add them to the pot. Fill with water to cover lentils about 1" and add one of your bouillon cubes. Cover and allow to cook on medium heat about 10 minutes.
* After 10 minutes, check your lentils to ensure that they are tender, but not mushy. 
* When ready, add your rinsed quinoa, another cup or two of water to cover, another bouillon cube, and cover. Allow to cook for another 10 minutes.
* While the quinoa is cooking, heat a frying pan on medium heat with a pinch of salt and 2 tbsp of olive oil. 
* Add your onions when the oil is hot, and cook about about 15 minutes, allowing the onions to get golden and soft. You'll need to toss them around quite a bit to ensure even cooking. Tongs are a good tool for this.
* Check your Mujadara. Taste to ensure that the quinoa is tender. You may want to add more spices at this point if it's tasting bland. Add your salt to taste and lemon juice.
* Add your spinach to the sautéing onions, and cook for about 2 minutes to allow to wilt. You can probably remove your pan from the heat - your spinach will wilt quickly.
* Serve Mujadara topped with your onion/spinach mixture, fresh cilantro, and your favorite hot sauce.

Monday, June 16, 2014

Cabin Eatin': Veggie Burgers, BBQ Corn Succotash, & Grilled Veggies

image

One of the hardest things to adjust to when you change your diet, whether it be gluten free, vegan, or just trying to watch your weight, is being around friends and family. I'm very lucky to have a family that's understanding and accommodating to my diet. Between the snarky comments and jokes, they always make a point of having vegan sides and main course alternatives for us. Coming from a meat and potatoes background, it's pretty surprising and wonderful. Even my mom, who detests soy, tofu, and carbs (which tends to be the crux of my diet), will stalk the grocery clerks at Trader Joe's and make them find all the best vegan products for when Andrew and I are in town. Our friends will take it as an opportunity to have an interesting vegan dinner party or experiment in their own kitchens.

But it does take time for people to adjust. I remember once when I first tried to go vegan in high school, my family was frustrated at the thought and refused to help. After a week of living off of canned green beans, my first foray into veganism was an abysmal failure.

However, fear not if you are in that same boat now. After a recent trip to my in-laws' lake cabin for the weekend, I bring you 2 sure-fire, meat-and-potato-approved side dishes that my in-laws love to make and eat. They're incredibly easy and use products your family is likely to have on-hand.


dinner spread

The first thing I would highly recommend for your first family get-together as a vegan is to make burgers. They're easy, you can bring your own, and most of the condiments are vegan. Here, we had a spread of avocado, tomato,  pickles, lettuce, and onion. If you want to bring other sides, to the left of the Hellman's is our vegenaise. To the right of the cheddar slices, is our daiya cheese. Don't be afraid to bring your own stuff to increase your own enjoyment. It's not insulting. And it takes some of the pressure off your family to accommodate you.

If they forget to get you vegan buns, make it a lettuce wrapped burger. Or, bring your own next time. Bread can be tricky. Especially if you don't eat honey.

DSC_0264

These are two tried-and-true sides that my in-laws love. To the left, you have a delicious BBQ Corn Succotash. The recipe is a highly modified version of Rachel Ray's (my mother-in-law's favorite).  Sub veggie stock for the meat stock, remove the bacon, and double check that your Worcestershire sauce doesn't have anchovies in it, and you have vegan BBQ Corn Succotash!

To the right, we cut up fresh squash, green beans, and onions, seasoned with salt and pepper, and baked at 400 degree with canola oil for 20 minutes. Super delicious, easy, and healthy.

What do you guys bring to your family gatherings? Do you find it difficult to eat with those who don't accept you diet?

Wednesday, June 11, 2014

Curried Chickpea Stew over Caulipots

CURRIED CHICKPEAS 6

I used to HATE Indian food, and of course while I was at Cal that was the rage. People would constantly drag me to Indian places and I would order some dry, too spicy chicken. Then they'd bring me this white sauce to cool it down and it tasted like paste. It was all bad.

But then I went vegan. Andrew took me to this little place in Cincinnati called Amol one evening when I came to visit him. We ordered the Aloo Chana, some type of Vegetable Pakoras, and Tandoori Roti. And that was all she wrote - I was hooked for life. It's a dish that I rarely see in other Indian restaurants. Sometimes you come across an Aloo Gobi or a Chana Masala, but those really just aren't the same. The sauce is creamy without the use of cream, and has this really perfect not-too-sweet spice to it. It's absolutely heavenly when you find it. There's another place in Columbus, OH called Taj Palace that we've found Aloo Chana, but since moving to Indy we have had no such luck.

I've painstakingly struggled to craft this at home. I've purchased obscure spices, blended different vegetables together, cooked it for hours. I even suspected at one point that they lied to us and there was clarified butter in it. I tried everything to no avail. The closest I've ever come to recreating the flavor actually occurred when I used cashew cream as the base. It happened on accident really. I just wanted to make a creamy curry dish, and when I took my first bite I thought - THIS tastes like Aloo Chana! Life can be that way sometimes, though. Try as you might to figure something out, then one day it falls into your lap when you least suspect it.

Curried Chickpea Stew over Caulipots
Serves 2-4 people, pending appetite assessment  

1 can of chickpeas
1/2 cup of quarter brussels sprouts
1/2 of a yellow onion finely chopped
1 tbsp olive oil
1/2 cup raw cashews 
Cold water
1-2 tsp curry powder (a quality curry powder is necessary!)
1-2 tsp cayenne pepper
2 tsp nutritional yeast
Juice of 1/2 a lemon
Salt to taste 
1/4 cup freshly chopped cilantro

1 Recipe for Caulipots (I love Isa's from "Appetite For Reduction")
I added garlic & chives to my caulipots for extra flavor


* Begin to prepare your caulitpots. They take the longest.
* Place your cashews in a blender first, then fill with cold water up to the 2 1/2 cup line. Blend on high for about 10 minutes. This works best with a high quality blender. I use a ninja.
* After chopping your onions, heat a pan with 1 tbsp olive oil and a dash of salt. Cook your onions on medium to low heat for about 5 minutes, allowing them to get golden. They add a lot of flavor, so it's important to be patient here.
* After 5 minutes, add your quartered brussels sprouts and cook with the onions for another 10 minutes. The pan may be dry, so feel free to add more olive oil or use a cooking spray. Continue to cook until the brussels are bright green and browned a little.
* Rinse your canned chickpeas and add them to the pan with your onions and spouts. Toss them together then add 1/2 of your spices, being careful not to over spice at this stage. Add your nutritional yeast and lemon juice. Continue to cook for about 2 minutes.
* Passing through a sieve, add your cashew cream directly to the pan. Stir together, turn your heat up a little, and allow to thicken and bubble. Taste and add the rest of your spices if needed.
* If your curry thickens too much, just add a little water to thin out.
* Finish off with fresh cilantro. Serve over caulipots and enjoy!

Tuesday, June 10, 2014

An Ode to Avocado - Authentic Guacamole

Pit and guac


My older sister used to do this weird thing when we were growing up. She'd slice open an avocado, salt it, and eat it with a spoon. She loved them so much, in their pure and simple form, that she could just bust it open and eat it. I don't think people do that enough with their food, or realize what the component parts of their meals taste like. Sometimes I watch reality shows (ok a lot of times I watch them), and Gordon Ramsey will blindfold chefs, feed them something, and be like - "What are you eating?" And it's something really common, like pineapple, and they'll say something ridiculous like "Mahi-mahi?" And Chef Ramsey will look super disappointed and make them feel bad. And he SHOULD! Pineapple doesn't taste anything like mahi-mahi.

But I digress. Point being - avocado is freaking delicious. You should eat it by itself sometimes. My sister was onto something.

And if not, here's a sweet guacamole recipe to make at home. Because at the very least, you should know what goes into a good guac and for the love of god, know how to slice one properly (hint: you do not peel the avocado!).

My first essential ingredient is cilantro. A lot of people hate cilantro, and I think that's really weird. Avocado and cilantro are like a PB&J to me. It's such a necessary combination. If you make guacamole and don't include the cilantro, it just tastes off. If you're one of those weirdos - 1, I'm sorry and 2, don't include them in your guacamole recipe. From there my essential list is, going for most to least essential, lime juice, salt, jalapeños, tomatoes, onion, garlic, and spices. 

Guac ingredients

My "Keepin' It Fresh Tips":
  1. KEEP THE PIT! If you put the pits in the container you store your guacamole, it keeps your guac from browning.
  2. Get as much air out of your contain as possible. Sometimes I store them in ziplock bags, zip it shut until there's just a little hole, and suck the air out like a little vacuum sealer. It's weird but it works.
  3. Cover in a layer of lime juice to seal out air and keep from browning.
  4. If you're making a lot, after putting it in your Tupperware, drop it on the counter a few times, or heck, even hit it. That gets those pesky air bubbles out and prevents sneaky brown spots.

Hate Kale? Try This Recipe.

Kale Salad Top View
This is a mixture of red and green kale topped with grilled onions and shredded carrots.

My family (and my in-laws) have really cute eating habits. My mom always has a BAG of breaded chicken in her fridge and pretty much everyone in my house has "chicken fingers" for lunch or a snack. We're a family a grazers really, and the only meal we sometimes would eat together was dinner. I never realized how totally bizarre our chicken-fetish was until Andrew stayed at my mom's house in California for a week and was completely baffled by it. But I also find his family to be really different. I've never seen an adult woman love grilled cheeses as much as my mother-in-law. Andrew's dad has a hilarious habit of asking for butter instead of olive oil for his bread at Italian restaurants. And I've never seen a family love steak houses more!

It's funny to think about our old eating habits and to see how different we've become, and how not-so-different. I still have bags of breaded chicken in my fridge - it's just gardein chick'n now. And Andrew stills loves binging on wings and ranch - except they're seitain wings with a dairy-free ranch now. But we've changed, too. I'd say our biggest change is the amount of vegetables we eat - and not just any vegetables, the vegetables that everyone hates - brussels sprouts, spinach, kale. The dark, leafy greens that were never cooked right as a child. We all grew up with mushy frozen spinach or bland, smelly brussels sprouts. It's no wonder we all hate them!

The first time I tried to cook kale, I hated it. I didn't remove the stems or rinse it very thoroughly and I wound up with a gritty, chewy mouthful. It wasn't pleasant. Since then I've done my research, and can honestly say this recipe is one of my favorite foods of all time (yep! favorite foods!). In our house we call it "Mayonnaise Kale" for the sheer amount of vegenaise I put in it (don't judge), but it's really more than that. If you hate kale or haven't quite figured kale out yet, this may be the ticket.

Warm Kale Salad with a Light Chipotle Dressing
Serves 2-4 people, pending appetite assessment  

3 packed cups of kale, stems removed and thoroughly rinsed
3 tbsp vegenaise
about 1 tbsp water
1/4 tsp chipotle pepper
1/4 tsp paprika
1/4 tsp fresh minced garlic
1/2 tsp parsley
1/2 of a yellow onion, sliced into half-moons 
1 tsp olive oil
salt & pepper 


* With a colander in the sink, rip off small pieces of the leafy greens from the stems of 1 bunch of kale, rinsing thoroughly with cold water. Set aside.
* Heat olive oil with a little salt on medium / low heat and begin to cook your onions. This will take about 10 minutes to get them golden and delicious.
* While the onions are cooking: mix together your sauce - whisk vegenaise, water, and spices in a large salad bowl until smooth. Set aside.
* Check your onions, remove from heat when done.
* Next, heat a deep frying pan or a pot with a little salt. Add your kale. It will look like it doesn't all fit, but your kale will reduce by about 33%. Using tongs, rotate the bottom kale to the top, constantly rotating to allow for even cooking. This will take about 7 minutes. Pieces will fly out and it will be annoying at first, but give it time. Your kale is done when it is wilted but still tender and bright green.
* When done, remove from heat, toss kale in your salad bowl with the dressing to coat. Serve topped with grilled onions. I've also added toasted pine nuts in the past, shredded carrots, or julienned raw red bell pepper. 


Monday, June 9, 2014

How To Make Cheater Chipotle Sofritas - Spicy Tempeh Style

Tempeh Sofritas Side View

All things Mexican food related are a staple in my house - rice, spices, beans, tortillas, and of course avocado. Growing up in Southern California with an avocado orchard in my back yard sort of makes that mandatory. It's something that I struggle with, though. It's easy as a vegan to go to Moe's or Chipotle on a regular basis, places where menus with nutritional facts are easily found online and most people understand what vegan means. But it's rare for me to find that really authentic Mexican food I once loved. We used to go to this restaurant in Columbus, OH - ask any native Californian in the area, Cucu's is the closest you'll get to authentic Mexican. And they just so happened to have clearly labeled vegetarian items and understood our dietary restrictions. We loved that place. They made me realize that I could still have that traditional experience without the traditional cooking practices (e.g. lard, animal bone stock, etc.).

But Chipotle did something pretty amazing recently. They started offering sofritas in select cities - touting "Vegans and Carnivores Unite", merging my old love with my new lifestyle. And they're right. It's so good, so not tofu-y, that I'm certain most anyone would love it. It added that spicy element that a vegan chipotle burrito was lacking. I had to recreate it.

If you've done your research, there's a lot of copy-cat recipes going around for tofu sofritas. People claim to have perfectly replicated it, using things like avocado oil or chipotles in adobo sauce. I don't know about you, but those are not things I tend to have on-hand. I wanted to use ingredients I always have and ones I assumed everyone else did as well - ketchup, soy sauce, olive oil, spices. And I wanted to make it with tempeh, because it has a better bite without having to fry or cook for a long time. You could easily sub tofu in this recipe (after draining the water from it, crumbling it, and cooking it longer). And I won't lie, this is quite a bit spicier than Chipotle's version - but theirs is designed for the masses and what's more authentically Mexican than a healthy amount of spice.

Cheater Chipotle Sofritas - Spicy Tempeh Style
Enough for 6 to 8 tacos 

1 block tempeh, sliced into 2 inch strips about 1/4 inch thick
4 tbsp ketchup
1 tbsp soy sauce
2 tbsp olive oil
1 tbsp olive oil for frying
1 tsp cumin seed
1 tsp paprika
2 tsp chipotle pepper 
1 tsp cayenne (use less if you don't like a lot of spice)
1/4 tsp salt
3-4 tbsp water for thinning the sauce

* Blend all your spices in a coffee or spice grinder until cumin seeds are powdered. I mix them all together in there, instead of just grinding the cumin, to make sure that the they're sufficiently mixed up. You don't have to do this though. 
* Whisk together spices, ketchup, olive oil, and soy sauce until smooth. Depending on how thin and the brand of your ketchup, you will need to thin the sauce some with water. It should be thick, but spreadable. 
* Marinade your sliced tempeh in a baking dish for about 1 to 2 hours, making sure that all pieces are sufficiently submerged in the sauce.
* Heat your pan on medium, salt and oil the pan, then cook the tempeh for about 2 minutes on each side, until browned. 
* Serve with your favorite tortillas, guacamole, and sautéed spinach. 

Tempeh Sofritas Top View