Tuesday, August 11, 2015

Crock-pot Stuffed Bell Peppers - The Mush That Launched a Thousand Ships

You can't really live in the midwest and not get gasps when you tell someone you don't own a Crock-pot. Truth be told, they've always intimidated me a little bit. I'm pretty involved during the cooking process and the idea of just abandoning my food all day to cook while I'm away gives me some strange level of anxiety. But I'm a mom now and rather than cooking for an hour every night after to work, I'd love to spend time with my son.

 So, cue that Crock-pot. The new working mom's solution. And now, my new arch nemesis.

 My first attempt was an abysmal failure. I found a recipe online for Crock-pot stuffed peppers, made my vegan tweaks, and set that baby up to cook for a modest 3-4 hours on high. I even got the fancy Crock-pot with the self-timer, so there was no fear of overcooking them. Or so I thought.

Eagerly, I went to open the lid hoping to find my first triumph in slow cooking only to find the MOST bland, MOST mushy peppers I have ever had the displeasure of consuming. These babies were loaded with chipotle field roast sausages, onions, garlic... they should have been jam-packed with flavor. Instead, the damn Crock-pot just bled it dry of all it's goodness and left me with what would probably be really great baby food.

 I didn't bother to bust out my DSLR for this failure, but here is the sad iPhone photo this recipe deserved:

I ate them, but only in the name of not wasting food.

So, dear vegans of the internet, what did I do wrong? Any advice for a slow cooker noob?

Wednesday, June 24, 2015

Life Happens | Where I've Been the Past Year

Baby Hugs at 9+ months!


Pregnancy is a funny thing.


Back in June of last year, my husband and I very unexpectedly discovered we were expecting our first baby. And anyone who's been pregnant before can attest to not only the stress of planning for a new little one, but also the nausea! I couldn't eat anything that smelled COOKED for at least the first four months. I basically lived off of fruit and pie, because it was all I could stomach. And that doesn't make for a very good food blog. Then of course, there was the move to a bigger house, with more space for our now growing family. My husband starting his own business out of our home in order to be with the family more.


With all that, there's no wonder why this blog died so suddenly. But with that note, my little one is now 4 months old - beautiful, happy, and everything a baby should be. I hope to continue blogging here now that I've gotten the hang of the whole motherhood thing. Although, I imagine this will change with each passing day.


As he grows and begins his life eating solids, I hope to be able to share our experiences, to bring encouragement, ideas, and insights to other parents of vegan families. And of course, for those veteran parents out there, advice is always and greatly appreciated!

Friday, June 27, 2014

Lemon Thyme Vegetable Hash

Untitled design-6

My mother-in-law has been talking about green bean delivery for what seems like years now. My husband's aunt (who I loved dearly) in an attempt to get more veggies into her diet when she first got sick, started using this strange service back in 2009. And I think it worked for the most part. It's certainly easier to eat what's already in front of you. I don't think it was too popular at that point, but now, several years later, I can't seem to avoid green bean delivery.

So I signed up! While I think the cost of the vegetables is quite a bit more than you'd pay for conventional at the grocery store, the quality of these local, organic fruits and vegetables is absolutely on point. You can taste the difference.

Each week your able to customize your box with different fruits and vegetables, but somehow I let zucchini into my basket. Truth be told, I'm not a huge fan. Now facing two giant zucchinis in my refrigerator, I had to make something with them.

I find that a vegetable hash is a good way to sneak in more variety without force feeding yourself things you don't like. Lemon & thyme are a classic combination that gives this dish a light freshness perfect for a summer bbq or a FIFA World Cup viewing party. I purchased all the vegetables from green bean delivery, and the quality of this dish was fantastic.


Lemon Thyme Vegetable Hash
Serves 2-4, pending appetite assessment  

1 giant zucchini
2 medium sized yukon gold potatoes 
1 shallot
1 tsp garlic, minced
3-4 sprigs of thyme
juice of 1/4 of a lemon
2 tbsp olive oil 
Salt & pepper to taste
Optional: tofutti sour cream on the side

* Chop your potatoes into very small cubes. Chop your zucchini into thick slices and then quarter the slices. Mince or finely chop your shallot. 
* Heat your olive oil in a skillet with a little salt on medium heat. When heated, add your potatoes and shallots and cover. Allow your potatoes to cook and soften for about 10-15 minutes. Check your temperature and lower the heat if they brown too much. 
* When the potatoes are just about done and your shallots have softened, add your zucchini, sprigs of thyme tied together, and garlic. Toss around and cook covered for about 5 minutes or until your zucchini is tender and bright green. 
* Last, remove skillet from heat and add your lemon juice, salt, and pepper to taste. Remove your thyme sprig bundle and serve with a side of tofutti sour cream.


Vegetable Hash

Wednesday, June 25, 2014

Yurtastic Chickpea Salad

Untitled design-5


We returned from visiting Andrew's family and some friends in Ohio late Sunday evening, and my motivation for cooking interesting things has been a little diminished. My sleep cycle is all out of whack, I nearly fell asleep during my commute home yesterday. But cramming as much as possible into our little weekends over there is really important to me, so we make it work. It's strange having uprooted my life so many times, every new city starts to blend together - and it oddly makes my wanderlust even stronger. When I go visit somewhere I used to live, I'm suddenly eager to live somewhere new. It's like, the less attached I feel to one city, the less I feel like I belong to a city. I spent 12 fantastic years in Santa Barbara - it's where I grew up - but I don't feel any allegiance to it. I've lived in Sacramento, Berkeley, Columbus, OH...  now Indy. I'm not sure I'd call any of them home. But I tend to wear my cities like a badge of honor - I've lived here. I know this place. 

To curb my itchy feet, I try to plan exciting vacations. I'm not much of a camper, but I've really be into these yurts. They're like decked out huts. Camping, or "yurting" rather (that's not a real phrase, don't go around saying that), has 2 benefits - one, I can commune with nature at a distance and two, we can bring our dogs. I just have to find a yurt that let's us bring dogs...

Hopefully some day soon I'll be blogging from a yurt in a Canada. 

Source: http://en.wikipedia.org/wiki/Yurt#mediaviewer/File:Gurvger.jpg

Anyway, I think this dish is perfect for your next yurt adventure. I plan on bringing some. It would stay nicely in a cooler and you can make larger batches fairly easily. There are a lot of great variations of chickpea salad if this one doesn't twirl your skirt up. Some of my favorites come form "Yeah, That 'Vegan' Shit",  where she uses nutritional yeast and kelp powder to create "mock tuna", and of course the PPK's minimalist variation, using traditional chicken salad ingredients. 

But I like to give new variations new twists. This chickpea salad sandwich packs a little heat using minced jalapeños and a touch of cayenne pepper. I opted for minced shallots rather than yellow onion. And of course, a heaping helping of vegenaise. 

Yurtastic Chickpea Salad
Makes 4 sandwiches   

1 standard can of chickpeas
1-2 tbsp minced jalapeño, fresh or jarred
1/4 tsp minced garlic
1 finely chopped shallot
a pinch of paprika
a pinch of cayenne pepper
salt & pepper to taste 
4 tbsp vegenaise

* Rinse your chickpeas in a colander in the sink. Place them in a high speed blender or a food processor & pulse 2 to 3 times to pulverize the beans, but don't let them get TOO mushy. You just don't want any whole beans.
* Place your blended chickpeas in a bowl and mix with the rest of the ingredients. You can refrigerate and eat for the next few days.
* I like to eat these with a little chipotle mustard on a whole wheat bun! 

Chickpea Salad Sammie

Monday, June 23, 2014

Spicy Brussels Slaw

Untitled design-4

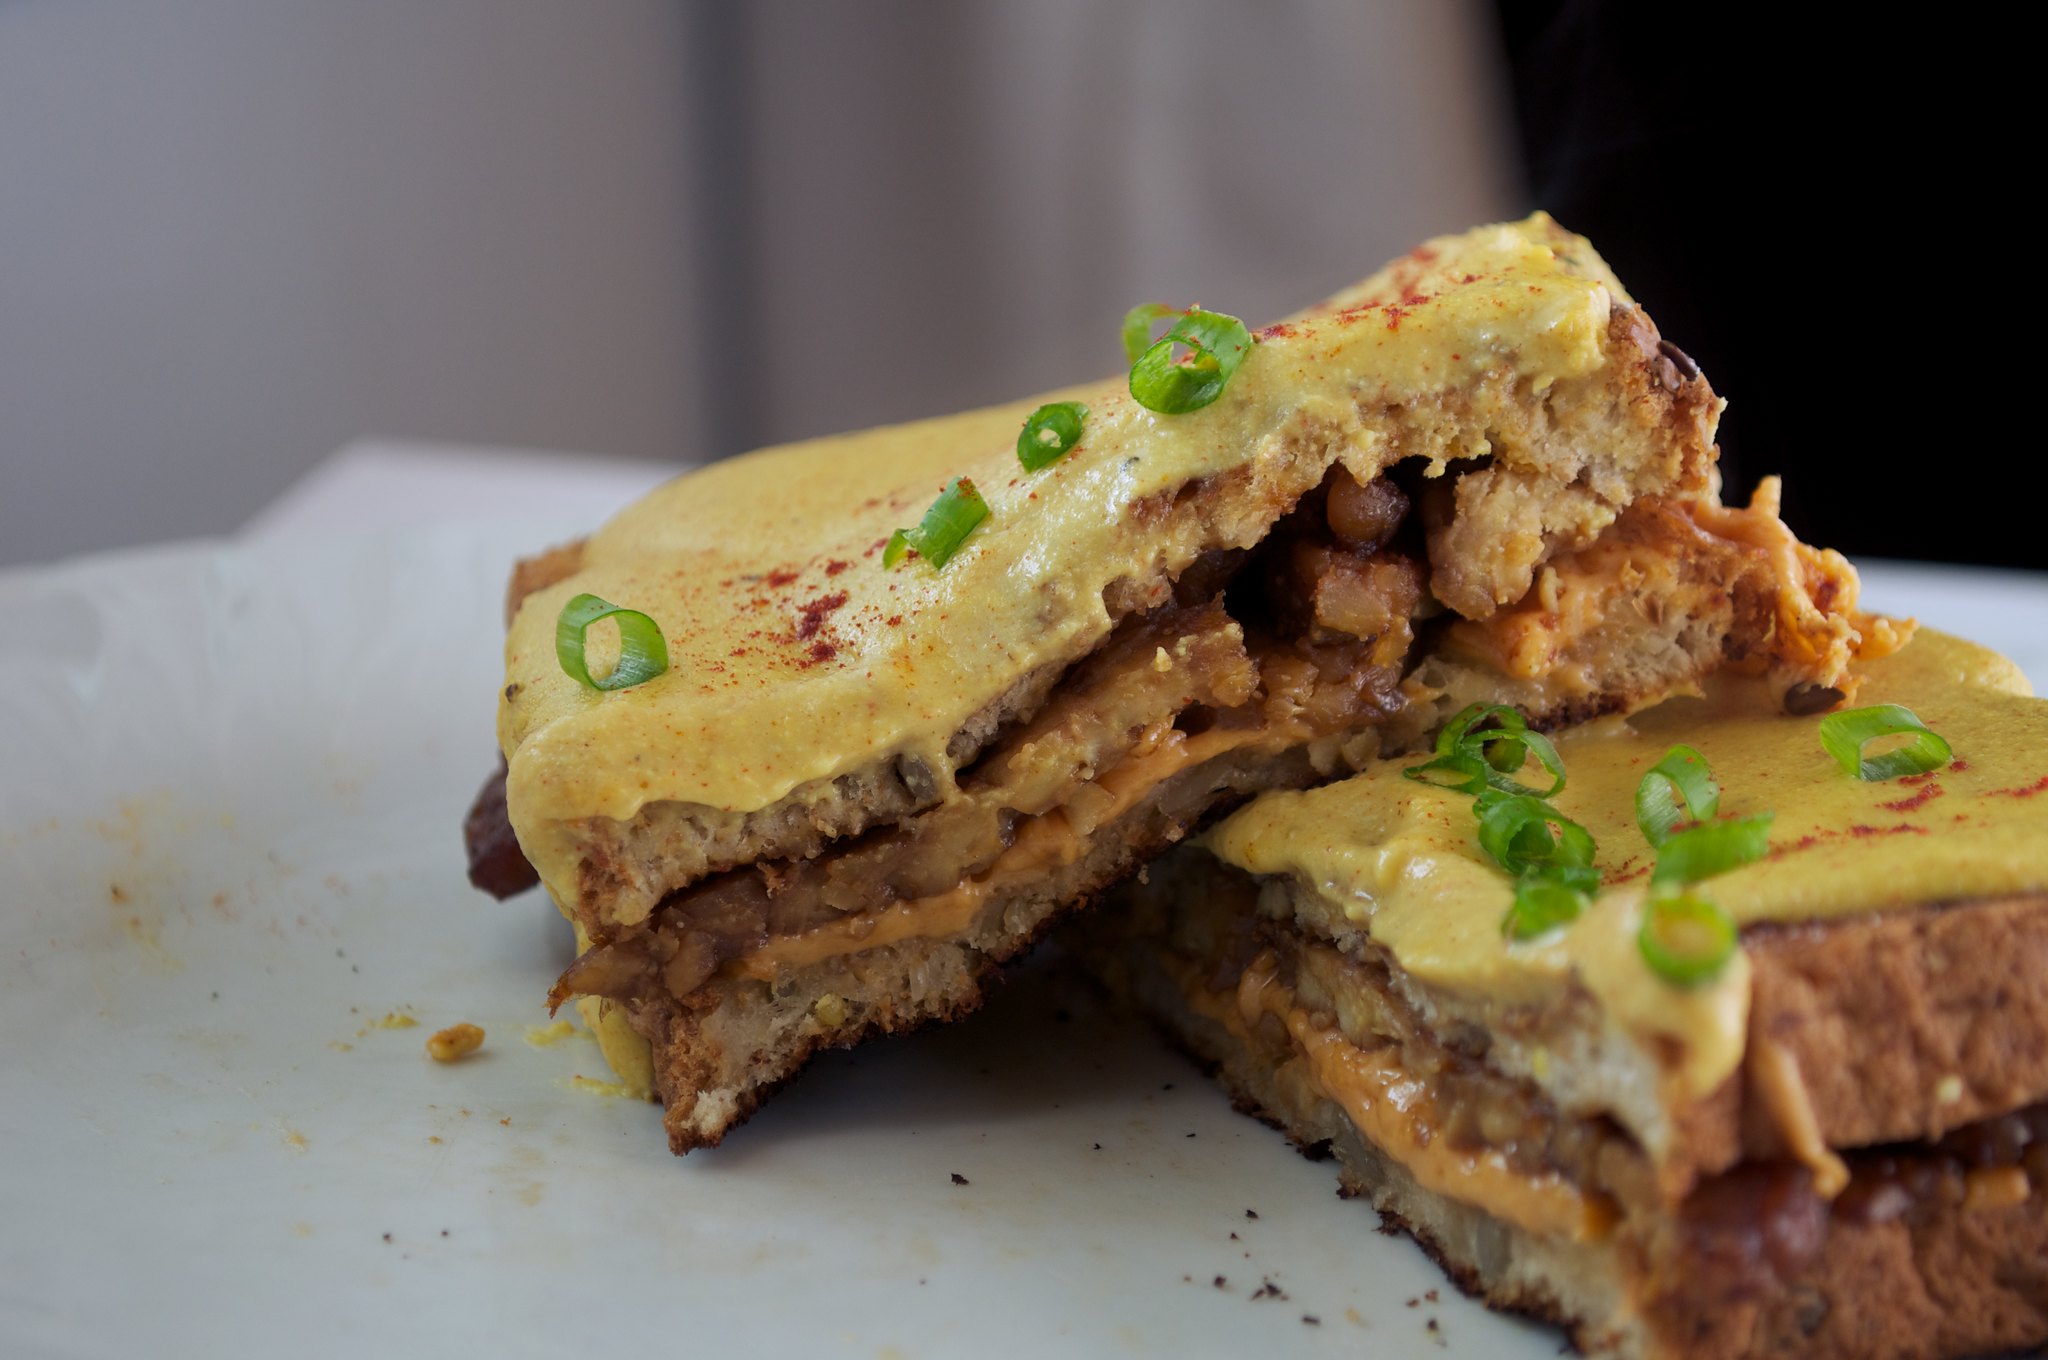
Another holiday is nearly upon us, and it's yet another food-centric one. For vegans, that can mean a lot of things.  You can wallow at home in protest of barbecues laden with franks and burgers, avoiding the awkward questions "can you eat this?" and the fuss people seem to make that always ultimately leads you to a plate full of crackers and fruit salad. Or, you can rise to the challenge... creating something seemingly "normal" and impart a little vegan food into the lives of your unsuspecting victims.

I always plan ahead for these sorts of things. Bring some veggie burgers with you and a few badass sides that no one will think are vegan. It has two benefits. One, you actually get to eat. And two, it's fun to see people happily eating something and then panic when you tell them it's vegan. Particularly kids. They always think they're eating something weird!

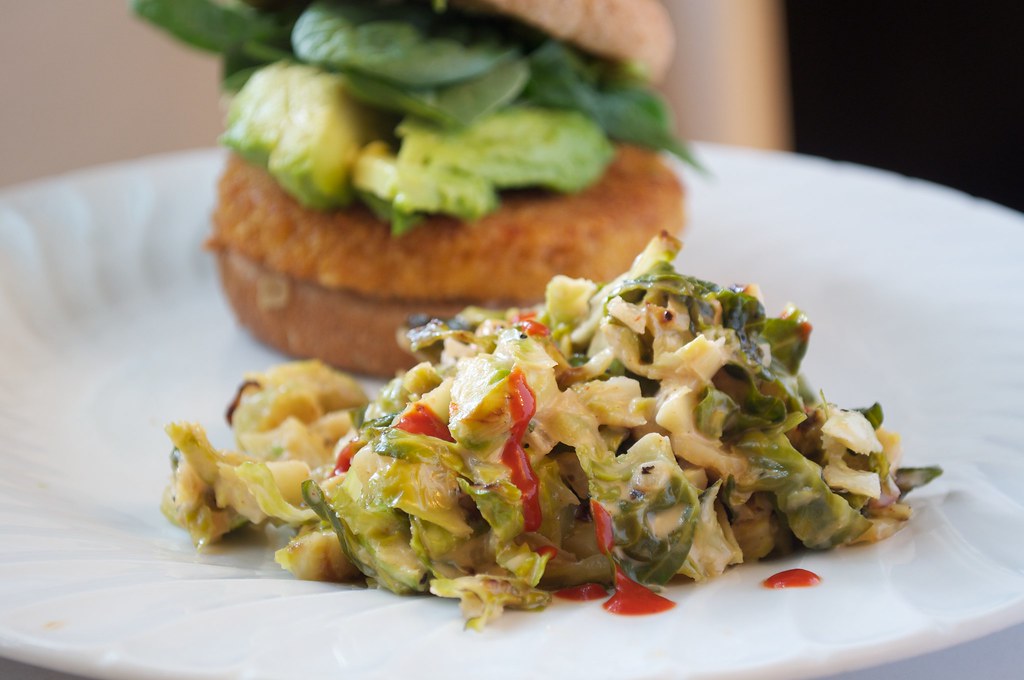
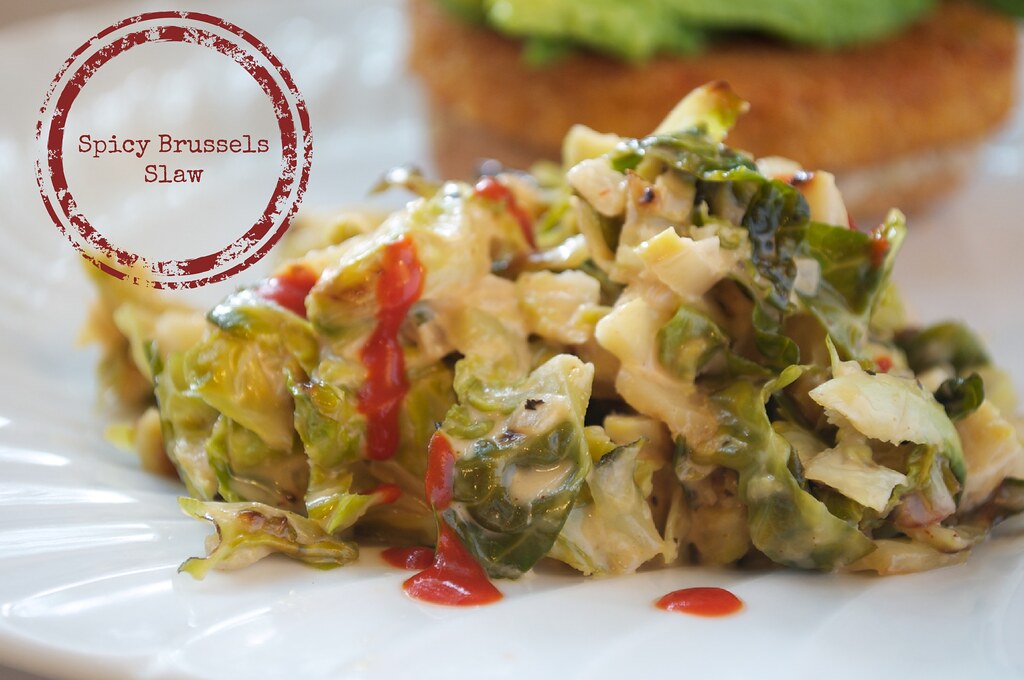
This cole slaw recipe, while hardly traditional, is a great option to bring. I don't really like the feel of raw cabbage, so I opted to use roasted and shredded brussels sprouts. I also like this served hot, but it would still work very well refrigerated. It's hard to go wrong with vegenaise and sriracha!

Spicy Brussels Slaw
Serves 2-4 people, pending appetite assessment  

2 cups shredded brussels sprouts
1 shallot, finely chopped
4 tbsp vegenaise
1 tbsp sriracha
Cooking Spray
Salt & Pepper to taste


* Preheat your oven to 425.
* While that's preheating, chop up your shallot and shred your brussels sprouts. I just use a knife and cut them like I'm slicing an onion. They pull apart easily in your hands. 
* Using a dark cookie sheet and some foil, spray your foil with cooking spray. Place your brussels on the foil sheet, then your shallots, and spray with a little more cooking spray and toss together.  
* Fold everything up to cover all the brussels sprouts and shallots, leaving a little opening at the top to release steam.
* Place your foil pouch on your cookie sheet and into the oven to cook for about 15-20 minutes. 
* While that's cooking, whisk together your vegenaise and sriracha. 
* When your brussels sprouts are finished in the oven, remove them and immediately place in your bowl with the sauce, stirring them to coat. Taste and add salt and pepper as needed.
* You can serve immediately with a drizzle of sriracha, or refrigerate and serve cold the next day. 

Brussels Slaw

Friday, June 20, 2014

Killer "Buttermilk" Biscuits & Gravy w/ Gardein Chick'n

Biscuits & Gravy

A lot of really "bad" foods are vegan.  I always tell people, "The less real the product is, the more vegan it is". Which is always funny to them, because they think of vegans as so healthy. That pillsbury buttercream frosting? Vegan. Not a lick of real butter in there. Your precious oreos with cream filling? Vegan. Not an ounce of cream in there. And as convenient and awesome as those products are, and as thankful as I was in my early vegan days for such modern conveniences, pre-made biscuits just don't hold a candle to the homemade ones.

I have a lot of comfort foods in my life, and these biscuits are one of them. Growing up, my parents always made those shamefully unhealthy, just-so-happen-to-be-vegan biscuits from a can (a can that pops really loud and scares the heck outta me no less). So when I finally started making them at home, I was baffled by how much better they are. Sure, they're a little misshapen, and their flakiness doesn't have that factory standard seal of approval, but they have a freshness and a lightness that you can't manufacture.  Topped with some awesome (and convenient) gardein strips and a killer gravy, I guarantee this will make you never want to buy a can of pillsbury biscuits again.

Killer "Buttermilk" Biscuits & Gravy 
Makes 8 big ole biscuits and enough gravy for all


Biscuits (recipe below)
Gravy
  1/2 cup raw cashews
  water
  2 tbsp earth balance
  1 tbsp olive oil
  1/2 cup chopped mushrooms of your choosing, I use portobellos
  1 shallot finely chopped
  1 tbsp chopped fresh poultry seasoning blend (a few sprigs of thyme, rosemary, and sage)
  Salt and Pepper to taste (I use about 1/4 tsp of salt)Gardein Chick'n
  Optional: creole seasoning and cayenne pepper

Optional: Green onions for garnish 


* Bake your gardein chick'n first. I season it with creole seasoning and cayenne pepper, but you can just bake them as is if you don't want to mess with it. This takes about 15-20 minutes. When they're finished, set aside in a warmer and increase your oven temp to 450 for the biscuits.
* Prepare your cashews. Place your cashews in a blender and fill with water to 2 1/2 cup line. Blend on high for about 8 to 10 minutes.
* While they're blending and when your oven is ready, place your biscuits in the over and bake for 10-12 minutes.
* While those are baking, heat a little salt, earth balance, and olive oil in a pot on medium heat. Add you mushrooms and shallots, cooking for about 8 minutes, allowing the shallots to soften and the mushrooms to brown.
* When ready, add you seasoning, nutritional yeast, and blended cashews to your pot of mushrooms and shallots. Mix and allow to bubble and thicken about 10 minutes. If your oil and cashews are separating too much, constantly stir or whisk your sauce as it thickens to allow the sauce to come together. 
* When your biscuits are ready, place 2 on plate, top with big scoops of gravy, a few pieces of chicken, and some green onions if you like for garnish. 


To Prepare the Biscuits:
2 cups all-purpose flour

1/4 tsp baking soda
1 tbsp baking powder
1 tsp salt
6 tbsp cold earth balance buttery spread, soy free
"buttermilk" - 1 cup unsweetened, plain almond milk + 1 tbsp white vinegar 

* Preheat oven to 450. 
* Add the vinegar to the almond milk and set aside in the fridge to keep cold.
* Whisk together the flour through salt. You can use a standup mixer or do it by hand. 
* Using a stand-up mixer on a low speed, add the cold earth balance, one tablespoon at a time. Then quick pulse a few times until it resembles a coarse meal, like wet sand.
* Add "buttermilk", until JUST combined. Place on a floured surface rolling once or twice to form a ball. Then flatten out with your hands to about 1/4 once thick. Try to handle with your hands as little as possible to keep the dough cold. Fold the dough in half, flatted, and fold over again about 5 times. Shape into a rectangle about 1" thick.
* Cut your rectangle of dough into 8 squares, and gently shape them into round circles if you like. Place on a sheet and put in the refrigerator until ready to bake.
* When ready, place an inch or two apart on a dark baking sheet for 10-12 minutes. Lay them cheek to cheek if you prefer a softer biscuit. 
*They will be puffy, golden and awesome when ready.


Biscuits and Gravy

Thursday, June 19, 2014

A Vegan Croque Monsieur | Now Known as "The Crunchy Mister"

Untitled design


There are SO many foods I never tried before I went vegan. Many of them I cringe at the though of trying, but sometimes I wonder - how can I accurately veganize something without knowing what it tastes like? But then it occurs to me, perhaps never knowing what it really tasted like allows me to enjoy a NEW version of that food merely inspired by their "meat & potatoes" version. They can stand alone in my mind and be completely delicious without having to harken back to flavors I remember. As delicious as a chickpea salad sammie can be, it will never replace the very powerful flavor & scent memories I have eating tuna fish sandwiches with my dad when he'd come home late from work. 

Suffice it to say, such delicacies like fermented shark meat are not really on my bucket list of "Things I Really Want to Recreate", and I think we'd be wise as vegans to let that shit GO. And really, probably let a lot of old "normal" foods go, like steak. You're not getting a vegan steak, people. That's just not happening.

But every now and then, I see a dish and think to myself - now I can DEFINITELY make a delicious vegan version of that. 

The croque monsieur is a french dish created in the early 1900's designed for the changing times, namely a desire for a "quick lunch". Roughly and hilariously translated, croque monsieur means "crunchy mister". Traditionally, it's grilled to a crisp in butter, filled with ham and some fancy french cheese, and then covered in a delicate béchamel sauce, sometimes stuck in the broiler to brown. My version is fried in earth balance, filled with tempeh bacon, daiya cheddar cheese and topped with a delicate cashew cream sauce, and it's absolutely fantastic. 

Because I've never tried a real croque monsieur, and I'm sure a cashew sauce is very different from a béchamel, I like to call this a crunchy mister. I'm not sure this will bring back any old memories you have of sitting in parisian cafes and people watching, but it will be delicious. It's vegan, inspired by a croque monsieur, and sure to be worth a few new food memories.


The Crunchy Mister (A Vegan Croque Monsieur)
Serves 2 people  


1/2 cup Daiya Cheddar-style Cheese
4 pieces of whole wheat bread
2 tsp of earth balance buttery spread
1 recipe of cashew béchamel (recipe below)
Green onions and paprika for garnish 

* Place 1 tsp of earth balance in a pan on medium heat with a pinch of salt. Allow it to melt and start to bubble a bit. 
* When ready, your bread on the pan. Using 1/4 cup of daiya cheese per crunchy mister, place half the cheese down, then 1/2 of your tempeh, then the rest of your cheese, then the other slice of bread. The daiya cheese acts as a sticky layer to prevent the tempeh from falling around.
* Spread the remaining tsp of earth balance, 1/2 tsp per sandwich, on the top layer of bread. Cover with a lid and allow to brown and get crispy for about 1-2 minutes. Be sure to check and make sure they are not burning!
* Flip your crunchy misters and allow the other side to cook for about 1-2 minutes as well.
* Remove from pan. Top each sandwich with 1/2 of your cashew béchamel sauce, sprinkle with paprika and green onions, and enjoy immediately. 

To Prepare the Cashew Béchamel 
- 1/4 cup cashews
- Water
- 1 tbsp earth balance
- 1/2 tsp paprika
- 1/4 tsp onion powder
- 2 tbsp nutritional yeast
- a pinch of turmeric for color
- salt and pepper to taste 

* Rinse your cashews and place in a blender. With the cashews in the blender, fill your blender to the 1 1/2 cup line with cold water. Blend for about 7-10 minutes until very smooth.
* Place cashews in a pan with your spices and nutritional yeast. Cook on medium to high heat for about 8 minutes, allowing to bubble and thicken.
* Remove from heat and whisk in 1 tbsp of earth balance.

Vegan Croque Monsieur

Vegan Croque Monsieur